- April 13, 2020
- 0

After disassembling the donor door pillar we cut what we needed to replace the rusted metal we had removed previously, then we media blasted and prepared them also for installation. We recommend that you use “Rust Mort” or some other rust killing product on all surfaces that will be covered up. This will stop and decay that may have been missed and keep the problem from showing up again later. We also primed the surfaces before we welded them in.
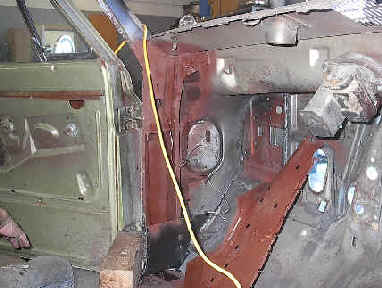
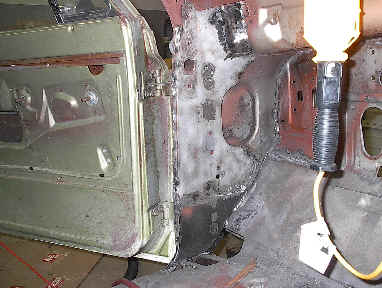
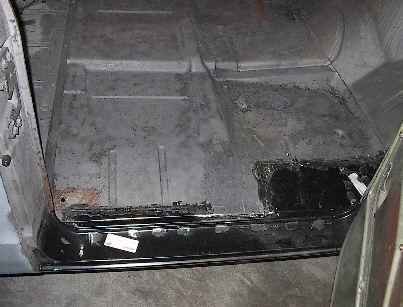
As you can see from the picture on the left we decided to cut more of the floor out. The rocker backing plate had some damage from something hitting it and there was some rust in it also. This was a good decision for a couple of reasons. It gives us an opportunity to test fit the parts we sell, while demonstrating that if you only need a part of the patch panel, cut it to fit the area that needs replacing. We are firm believers in keeping as much of the old iron as you can. Secondly as you will see later in this project, there is a proper assembly order. You always install the floor patch before you install the kick panel patch. As you can see in the picture on the right, the front floor patch panel took a pretty good beating installing it in the wrong order. We are happy to report though, the fit is great!! You can find and purchase both of these patch panels in the patch panel section of our website. (Click here) To go to that section.

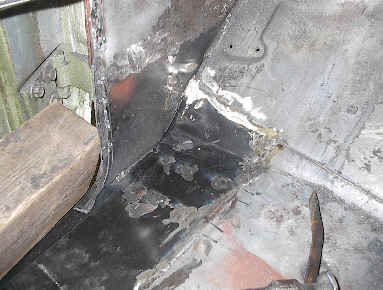
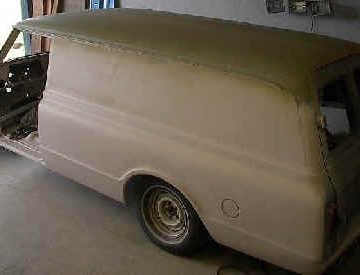
We repaired the kick panel and floor section on the right side with our patch panels and this time installed the floor section first. We can report that the floor section went in a heck of a lot easier and the kick panel once trimmed to fit what we had cut out also fit well also. We don’t mean to say that this repair was easy, however our patch panels made the job a lot easier than it otherwise would have been. They are real time savers!! Here are both sides so that you can see what it looks like before primer. As you can see we also installed new rockers. We also went with our reproductions with these. The fit wasn’t perfect, however neither were the Genuine GM panels. So for these parts, I would have to say we prefer the reproductions for a couple of reasons. One, they are made from thicker gauge steel (Reproductions – 1.2ml, GM – 1ml.), and two price, (Reproductions – $14.95, Genuine GM $80.00)
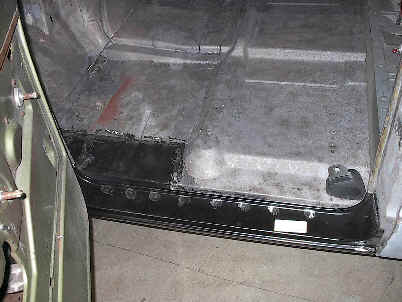
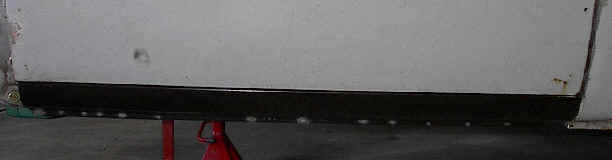
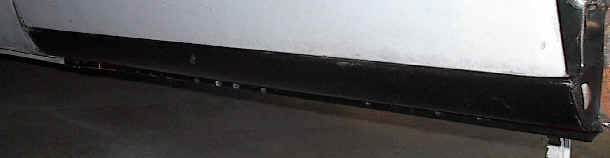
Although they are hard to see here are pictures of the rocker alignment with the bottoms of the doors. We think that it is pretty good!! When these repairs are finished, we will primer the effected areas and you will be able to see the alignment and fit better.
(Left Side)
(Right Side)
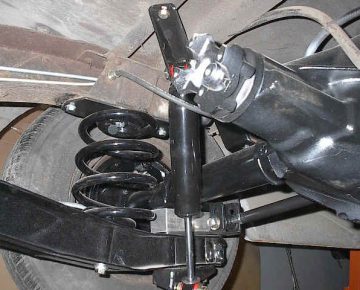
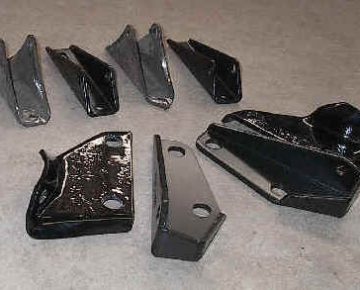
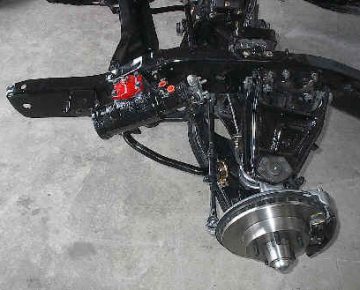
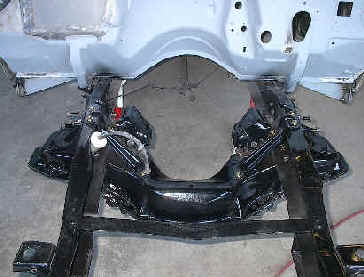
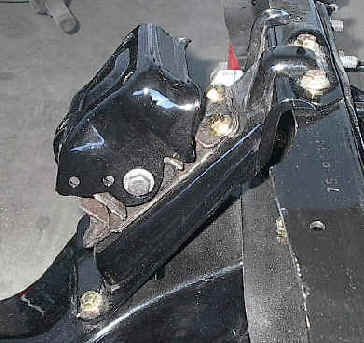
We received some of our powder coated front end parts back from the powder coating company so we decided to change gears and install what we could. As stated in previous pages we are going with a complete 1971-72 system. Unfortunately some of the components of the system we have are rusted beyond use, so we cannot complete it at this time. We will be replacing all of the tie rod ends, ball joints and pitman arm. The picture on the right is one of the 72 Big Block engine mounts. We decided to use them over the 68-71 style because they are stronger. They also make it easier to install Big blocks and the motor mounts for these are 1/3rd the cost of the 68-71. A little F.Y.I. for you. Big blocks weren’t ever installed from the factory in, any of the 67 trucks, Panels, or Suburbans. They were also never installed, nor were they an option for any of the 67-72 4X4 Trucks, Panels, Suburbans, Blazers, or Jimmies.
- April 13, 2020
- 67 Panel Project
related posts