
- April 13, 2020
- 0
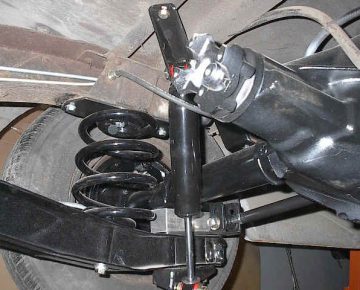
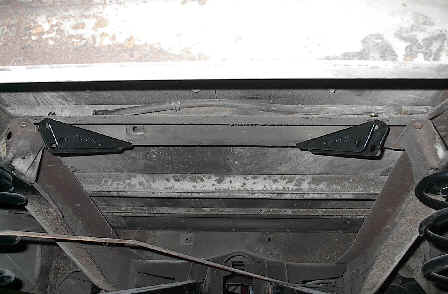
Top left is the stock rear shock mounts removed from the Panel along with or Rear Shock Relocaters. You can see there is quite a difference in them. This kit will return the rear shocks to their stock angle so that they function as they were designed to. If we did not use this kit, and left the stock brackets in place, the shocks would not compress. They would swing up and down rendering shocks useless.
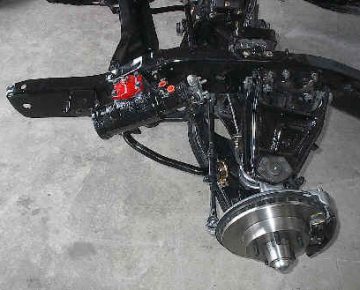
We had a 5 lug 3.07 Possi rear end set aside for our project. We retrieved it from storage and noticed that the pinion seal was leaking, so we decided to pull the pinion yoke and replace the seal while the rear end was out and accessible. After we pulled the seal, we figured while we had it apart that we would take a look at the front pinion bearing. As with a lot of restorations this usually turns out to be a good practice. Once we had the bearing out where we could look at it, we discovered that it was a little pitted. This would cause the rear end to whine, and ultimately fail. Possibly on the road, where there would have been tow fees and everything added to the expense of fixing it after waiting for it to fail. If that would have happened, we would have had to replace the entire ring and pinion, because of the abnormal wear patterns this ultimately would have caused on the gear teeth. Not to mention what would have happened if the metal filings would have made it up into the teeth. So the decision was made to replace all of the bearings, and while we were in it to replace the clutch assembly also. We also decided that we would go to the higher quality carbon clutches for our application. Sorry we didn’t take any pictures of that process, but we will probably do a write up on that process sometime in the future. However we did get pictures of the rebuilt rear end installed and the following pictures will show that.
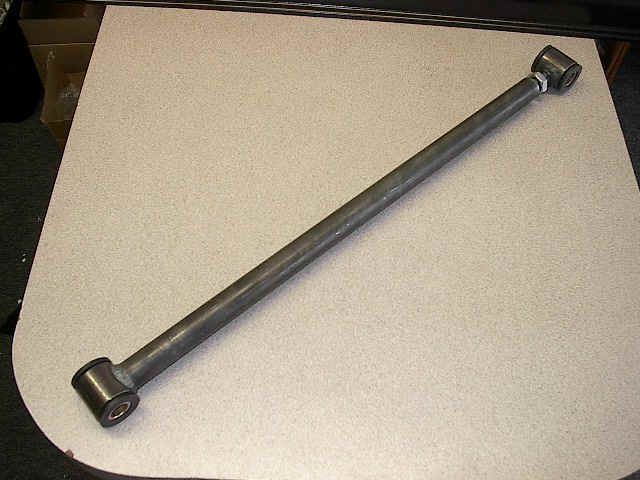
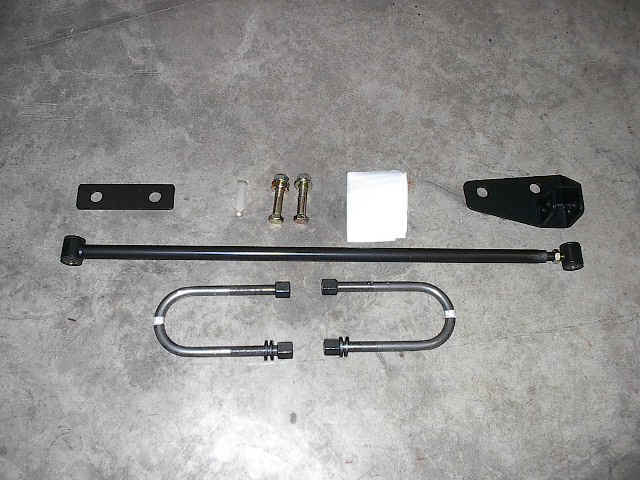
Now back to lowering the rear of the Panel. As stated previously we decided to use the 4″ lowering springs and 2″ lowering blocks. If we were just lowering the rear 4″ or less we would have only needed to replace the pan hard bar with an adjustable one. This is necessary because the rear end of the truck needs to remain centered. (This is the function of the pan hard bar). When you lower a one of these trucks the mounting points of the pan hard bar remain in the same locations, however the distance between those two points changes. Just using your original pan hard bar will then push the rear end toward the right, causing it to be off center. This will not allow your truck to track strait driving down the road, and will also cause uneven tire ware, not to mention making it more difficult, or even dangerous to handle. If you have seen any lowered truck driving down the road “Doglegged” (the rear end is closer to the side of the road than the front) this is usually caused by reusing the stock pan hard bar. This why we have our adjustable pan hard bars. Pictured right is one of our adjustable pan hard bars and pictured left is our Super Pan Hard Bar Kit.
- April 13, 2020
- 67 Panel Project
related posts