- April 13, 2020
- 0

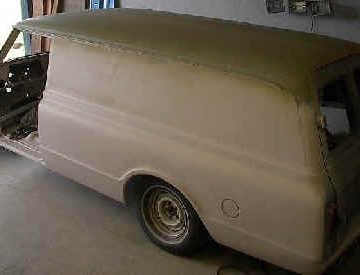
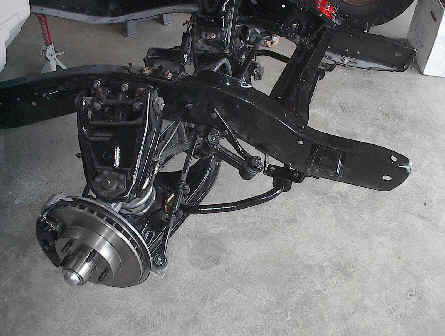
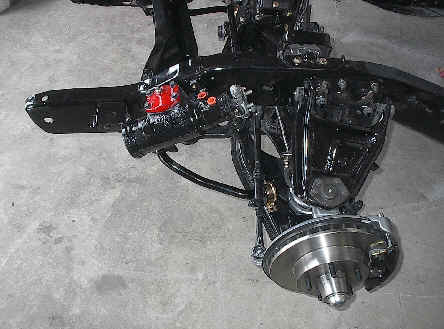
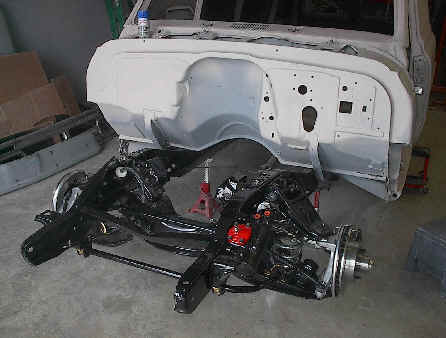
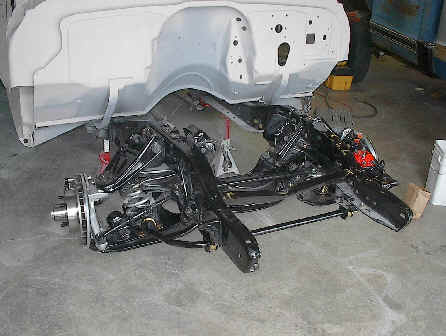
As explained near the beginning of this project, we decided to go with a 72 Suburban 1/2 ton front end. We had the crossmember, upper & lower control arms, front sway bar, sway bar brackets, 2″ lowering coils, and 2 1/2″ lowering spindles, and disk brake backing plates all powder coated for ease of clean up after we start driving it. As you saw previously we had already installed the crossmember and 72 BB engine towers. We received all of the new front end components that we are going to use. This list consist of, all new tie rod ends, adjuster sleeves, upper and lower ball joints, idler arm, pitman arm, poly sway bar bushings, 2″ lowering coils, 2 1/2″ lowering spindles, and a quick ratio, remanufactured steering gear. We decided to use the “Moog” brand components for everything except the poly sway bar bushings, springs and spindles. It is our opinion that “Moog” brand parts are the best in the industry and we didn’t want to mess around with cheap parts when it came to the front end of this project. We used “Energy Suspension” for the poly sway bar bushings and McGaughy’s spindles and springs to bring the front end down. We also used “Red Head”, remanufactured steering gear, because we feel that they are among the best in the industry. All of these components can be purchased on line here in our 67-72 Chassis, Brakes, and Suspension section of our website.
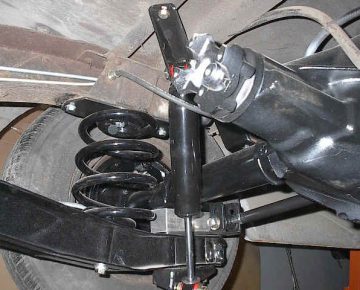
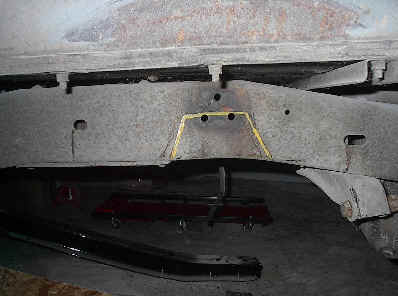
After mounting a set of old paint rag wheels and tires on the front, we decided it was time to go to work on the rear suspension. To begin this process we first lifted the back end of our Panel, and placed the jack stands under the frame, just in front of the rear wheel wells. We chose this position because we were also replacing the 3.73 geared rear end with a 3.07 possi. that we were saving for this project. While we were at it we also decided to replace the rubber bushings in the rear control arms. That turned out to be a good decision also. Once we removed the rear end which left the control arms hanging by themselves, we found the original rubber bushings were so bad that you could swing them side to side enough to make them touch on the ends. I always wondered why this thing felt like the rear was swinging around a lot!! Anyway we replaced them with polyurethane bushings. We thought that those were a better choice over rubber, because polyurethane is a lot harder material. That will result in a far better handling truck. We did not get pictures of replacing the control arm bushings, but the process is pretty strait forward. First we burned out the originals, and once cooled, we cleaned out the outer shells with a small wire brush. We then applied the grease inside the shells that was supplied with the bushings, and pressed them in. Then remounted the control arms to the frame. We also decided that because we are dropping the rear 6″ to level it out with the front, that we would need to install one of our bolt in frame “C” notch kits. This will give the rear end added clearance between the top of the tube and the bottom of the frame. This results in a better ride because it will keep the rear end axle tubes from hitting the bottom of the frame when you run over large bumps in the road.
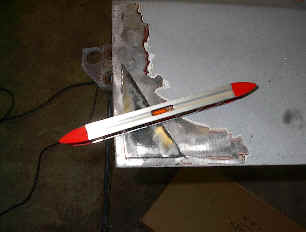
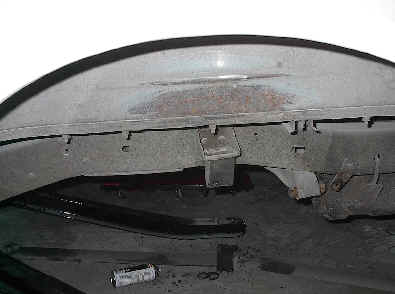
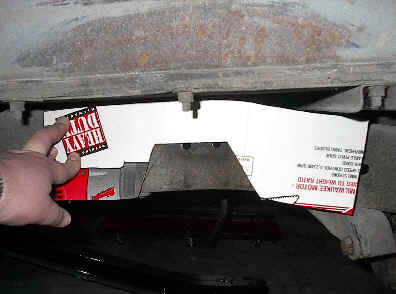
Here are pictures of this process: The first picture shows the rubber bump stop and bracket that we first had to remove before we could proceed. It is riveted to the frame so we carefully cut the rivets with a torch, removed the bracket with a hammer. Then ground the rivets smooth and knocked them out with a punch. The second picture shows the template that we made to mark the frame with for the “C” notch reinforcing plate. The last picture shows the mark in the area that had to be cut out. (Incidentally the same template can be used for both sides of the frame, just flip it over for the other side.
- April 13, 2020
- 67 Panel Project
related posts